Blogs > Mission: Pinpossible

Nicole Franz is a copy editor and paginator at The News-Herald in Willoughby. She takes all those sweet recipes, grueling workouts, cleaning tips, money-saving tricks, do-it-yourself projects and looks that seem so cool on Pinterest and writes about how they really turn out.

Tuesday, December 4, 2012

Healthier cake with packed pumpkin, any boxed cake mix


I’ve been dying to make cake bites since I started this blog. But the first step of making cake bites (a.k.a. cake pops or cake balls) is to bake a cake. So I started out with a healthier base to this sugary confection. 


I didn’t bake the cake to the instructions. I cheated a little to make it healthier (or as healthy as anything can be when it involves a tub of icing and chocolate coating). My mom passed along this tip, which she may have gotten from my sister-in-law Karen or my sister Liz, that you can take any boxed cake mix and — instead of adding oil and eggs — you just add a can (15 ounces) of solid packed pumpkin instead. That’s all it takes. Packed pumpkin and cake mix all mixed up and baked in the oven to the directions on the side of the cake box. There’s a pin floating around that highlights the awesomeness of this technique in muffin-form.
I’ve been using this trick to make healthier (and pumpkin-flavored treats for more than a year). The cakes are still moist and delicious but much healthier than if you had added eggs and oil. 


In my experience the pumpkin flavoring complements spice cakes and carrot cakes and enhances white and yellow cake mixes, but in chocolate cake it’s virtually untraceable. Most people have no clue there’s pumpkin in it unless you tell them. 


Anyway, I wanted to make German chocolate cake bites with coconut pecan frosting and a dark chocolate coating and spice cake bites with cream cheese frosting and white chocolate coating. So I started off with the German chocolate cake.


Mixing the cake batter and the packed pumpkin it ends up being a bit thicker than the standard eggs- and oil-filled cake batter. Once it was all mixed up I dumped it into a metal pan and attempted to evenly spread it around. I didn’t really have to worry about how it looked though (my favorite kind of baking) because I was just going to crumble it up when I made the cake bites. 


I baked it to instructions and let it cool.


Then I mixed up the spice cake and packed pumpkin. This one didn’t really mix as smoothly as the German chocolate cake. The spice cake has little lumps in the mix that wouldn’t really mix up no matter how much I stirred the batter. So I didn’t worry about it, dumped the mix in a glass baking dish and tried to spread the thick batter as evenly as I could (again, not worrying about the aesthetics). 

I baked it to the instructions on the side of the box, then pulled it out to let it cool. I covered both the cakes and put them out of sight so my roommate wouldn’t be tempted to indulge while I headed to work. 

The next day, I got to work on all the other steps that resulted in some pretty popular treats, but I will blog about that in another post.

Love pumpkin? 

I've also blogged about soft pumpkin cookies that are hard not to scarf down, a pumpkin French toast bake that will brighten any morning, and an easy and delicious pumpkin cheesecake.


— Nicole Franz | NiFranz@News-Herald.com | @FranzOrFoe
Follow my Mission: Pinpossible board on Pinterest.

Labels: , ,

Monday, October 1, 2012

Gwyneth Paltrow recipe offer guilt-free French fries crazy easy to make

All sliced up and ready to go.
So I haven’t gone grocery shopping in a while, and was trying to come up with a Sunday afternoon pre-work meal that would fill me up for a night of editing and page design without making me feel guilty. I rummaged through my pantry and fridge and didn’t find too much that was striking my fancy. I did have potatoes though and remembered pinning something about a healthier french fries recipe recently.

So while I nuked some frozen vegetables in the microwave (I’m a big fan of frozen veggies as a snack/meal with some combination of cheese, spices or salsa) I found this pin touting Gwyneth Paltrow’s No-FryFries from her cookbook, “My Father’s Daughter: Delicious, Easy Recipes Celebrating Family & Togetherness.”

If you click on the pin it links you to Self and a full recipe, but again I went with what was on the actual pin.

What was the point of dunking them in water?

Instructions

"Gwyneth Paltrow's No-Fry Fries, just cut up your potatoes and place them in a bowl of cold water, then dry them off and toss them with olive oil, place them on a cookie sheet and sprinkle with sea salt, then bake at 450 for about 25 minutes, turning occasionally."

How it went

I grabbed two Idaho potatoes and scrubbed them down, which is much harder to do effectively without a scrub brush, but I digress. I turned on my oven before I tracked down a cutting board and knife.

I didn’t skin my potatoes, because it didn’t say to on the pin (though it does on the Self recipe), so all I had to do was hack up the potatoes into fry-shaped strips. I cut the potatoes in half first to facilitate easier cutting.

Then I tossed the potatoes in a Rubbermaid container that I knew had a lid and added enough water to cover them. I’m not entirely sure what this step did, unless it was meant to clean the potatoes further. 

Seriously, was this for cleanliness? I already scrubbed the potatoes.

I went a tad overboard on the olive oil.
Then I drained out the water and tossed the potatoes on some paper towels so I could pat them dry with another paper towel.


I dried out the container I just had the fries in and dumped them back in there along with about 3 tablespoons of olive oil. I put the lid on and shook the potatoes up until I felt they were solidly mixed (a few healthy shakes).

I decided I wanted to be super lazy and put aluminum foil over my cookie sheet, which I sprayed with non-stick cooking spray. Then I fished the potatoes out of the container with a slotted spoon so I wouldn’t end up wasting a ton of olive oil (that stuff’s expensive!) on the cookie sheet.

I arranged them haphazardly on the sheet and then tossed a bit of sea salt on them.

Oiled up and ready for the beach (or my oven).
I placed them on the middle rack of my oven and promptly forgot about them for 25 minutes. The pin says to turn them occasionally (how vague is that?), but I didn’t bother.

They're so shiny!
I pulled them out after 25 minutes and tossed them on a plate for easy eating.

Results


Maybe I should have turned these, or perhaps taken them out a little earlier.
This was crazy easy to make. It required almost no effort, and the fries were a satisfying substitute for regular old fried french fries. Some of the fries turned out a little crunchier (read burnt) than I would have liked, but most of them were the perfect amount of crispy.

The water part and subsequent drying of the recipe seemed a little bit unnecessary and wasteful. I’d probably skip this step in the future and see how it goes.

I wasn’t sure how much olive oil to use and definitely overdid it on that part, but I ended up just tossing my veggies in the olive oil with some spices and a little Parmesan cheese and it ended up very yummy and not wasteful. The Self version of this recipe says to use 2 tablespoons of olive oil. That would probably have been a perfect amount, and I wouldn’t have felt the need to fish my fries out of the container with a slotted spoon.

I also overcooked them a bit (big surprise). I am eventually going to figure out how to bake things perfectly in my oven (and then I'm promptly going to move out of my apartment probably). 

I will definitely make these again, so kudos to Gwyneth Paltrow. I really enjoyed her turn as Pepper Potts in the “Iron Man” and “Avengers” movies, and she showed how multitalented she is with a turn on “Glee” and now this cookbook. Thanks to those distinctive roles, I’ve finally managed to not confuse her with Cate Blanchett.

UPDATE

Thanks to my college friend and Post colleague Emily Carroll I learned that the water removes excess starch and helps make the fries crispier. So apparently dunking the potatoes in water is a worthwhile step. (5:32 p.m. Oct. 1, 2012)

— Nicole Franz | NiFranz@News-Herald.com | @FranzOrFoe
Follow my Mission: Pinpossible board on Pinterest.

Labels: , ,

Tuesday, September 18, 2012

Healthy cookie dough promises full flavor without full fat


This pin promised me a “Healthy Cookie Dough Dip recipe - made with chickpeas.” And I suppose it delivered on that. Clicking on the pin, the blog written by a woman named Marianna, says “It tastes exactly like cookie dough.”

As a former kitchen helper who grew up with the privilege of licking the spoon and beater, I cannot get enough cookie dough. Sometimes I make cookie dough with the intent of just eating cookie dough. Though the sugary goodness is delicious, it’s also a tad fattening (I don’t know if you heard but eating a vat of dough is probably bad for you), so I naturally was stoked at the idea of something healthy that tastes “exactly like cookie dough.”

So one night when I got home from work and my sweet tooth hit, I thought I’d give it a shot.

The ingredients are pretty simple and so are the instructions, so I stuck to them as best I could.

Ingredients

2 cups of chick peas (You can buy a can in the store. Just be sure to drain them.)
1/2 tsp. of salt
1/2 cup of chocolate chips
2 tsp. of vanilla
3 TBSP of sugar
2 TBSP of coconut oil (or any oil)
2 TBSP of milk

Instructions

Mix everything together in a food processor. Or pulse in a blender. Everything, BUT the chocolate chips. You want to pulse it until everything is really smooth. When you finish just add chocolate chips and serve!

How it went


I don’t have coconut oil, nor have I been able to locate it anywhere in a grocery store, so I used the canola oil I had lying around, it fits the “or any oil” part, right?

I piled everything into my Magic Bullet and attempted to get everything “really smooth.” As you can see this didn’t work too well. The dough was still pretty chunky after I blended it for an extended period of time (3+ minutes), so I added a touch more milk and a touch more oil, maybe a teaspoon of both. This seemed to help but again the texture was still pretty rough.

When I’ve made hummus in the past I’ve been able to get everything pretty smooth, but this wasn’t supposed to be nearly as creamy as hummus is.

I tried taking it off and stirring it to get it to get the dough to mix better. Nothing seemed to work. After about five minutes of struggling with it, I figured this was as good as it was going to get texture-wise. So I spooned the most well-mixed parts of the dough into a bowl.

I added the chocolate chips and thought, “This really looks like cookie dough!”

Results

This poor blogger must have had an awful childhood filled with terrible cookies if she thinks this is what cookie dough tastes like.

It was awful. I had two bites and had to put it down. It wasn’t sweet enough. It wasn’t creamy enough. It tasted nothing like cookie dough to me. When I got a bite of the chocolate chips it made it bearable, but overall it was too chickpea-y. I like chickpeas, but if I’m expecting something “exactly like cookie dough” they are not high on my list of things I want to taste.

I tried to rescue it by adding more sugar. Nope, nothing could be done. It was awful. I ended up throwing it down the garbage disposal.

If this is what all healthy cookie dough alternatives are like then I will happily take the calories, fat and sugar of real cookie dough. I guess I’ll just work on moderation with the real thing, and cherish those full-fat memories of licking cookie dough off the mixer attachment.


Labels: , ,

Sunday, September 2, 2012

Baked avocado fries are yummy alternative to fried snacks


I love avocados. They’re high in potassium, they have the “good fat” (whatever that is exactly), and they’re yummy. If they were consistently inexpensive they’d be a regular part of my diet, instead of an oooh-they’re-on-sale-so-I’ll-buy-four kind of item. 

I also crave greasy junk food from time to time (who doesn’t?), but I’m trying to be healthy and shed a few pounds. That’s why my eyes kind of light up when I see pins for foods that have that deep-fried/sugary/fatty look, but promise a healthier way to achieve the taste be it by baking, substituting ingredients, or whatever.

This pin for baked avocado fries might have actually made me salivate a bit. I love French fries dipped and avocados (so much fat!), but had never thought of cutting the potato out of the equation entirely. 

The pin actually refers you to this blog, which then refers you to another blog called Adventured in Cooking, where the recipe (and some pretty cute photos of the blogger’s baby son reside). Beth (the blogger), adopted a deep-fried avocado fries recipe from Circle B. Kitchen, another blog about food. Have I lost you yet?

I stuck with Beth’s recipe, which is exactly the same as the deep-fried version minus the canola oil and frying part.

Ingredients

1/4 cup flour
1 tsp kosher salt
2 large eggs, beaten
1 1/4 cups panko (Japanese bread crumbs)
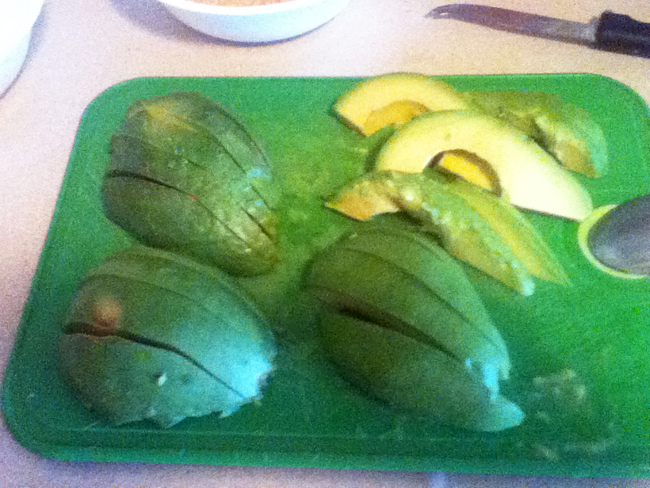
2 firm-ripe medium avocados, pitted, peeled, and sliced into 1/2-in. wedges 
Grated parmesan for serving (optional)

Easiest part of the recipe accomplished!

Instructions

Preheat oven to 450. 
Coat avocado slices in the four, then egg, then panko. Spread on a cooling rack that has been sprayed with non-stick spray, then place on a cookie sheet.  Spray the top of the wedges with olive oil and sprinkle with salt, then bake for about 20 minutes at 450, or until they are golden brown (I turned my oven up to 500 for the last 5 minutes).

How it went

Assembly-line style: Flour to egg to panko.
 I started off by assembling all the ingredients, I’d even bought kosher salt for this recipe (and many others I’m going to try for this blog). I had plain bread crumbs from Giant Eagle and figured those would sub for panko, nicely. 

“2 firm-ripe medium avocados, pitted, peeled, and sliced into 1/2-in. wedges.” Each avocado ended up yielding about 10 slices for me. I guesstimated instead of measuring so my wedges weren’t uniform. 

Bald patches on my avocado fries.
“Coat avocado slices in the four, then egg, then panko.” This one got a little messy (I’m starting to think it might be me). Avocados are slick to begin with, and the flour/egg/bread crumb combo seemed to get a little tricky. I arranged everything assembly-line style, and started by hand. That ended up with my paws covered in flour, egg and breadcrumbs. I tried to use a fork. That ended up with my hands slightly less covered in flour, egg and breadcrumbs, but kind of ended up breaking one of my avocado slices in half. I tried using tongs and that didn’t help. I ended up using a fork/hand combo that seemed to work for me. The other problem I encountered here was getting everything to coat evenly on the avocados. I seemed to be brushing off flour, and then it would clump on the avocado slices awkwardly then fall off in the egg. I ended up with slices that had patches where the coating didn’t take.
First batch ready to bake.

“Spread on a cooling rack that has been sprayed with non-stick spray, then place on a cookie sheet.” I actually don’t own a cooling rack. I do own a toaster oven though. And that toaster oven has a mini-oven rack that I can pull out. I used that as my makeshift cooling rack. It’s not terribly large, so I did my avocados in two batches. I failed to spray the rack on the first batch. (Spoiler alert: You should spray the rack.) 

I knew I should have checked them sooner.
“Spray the top of the wedges with olive oil and sprinkle with salt.” I actually didn’t have spray olive oil and couldn’t find a reasonably priced can when I went looking in the grocery store, so I just went with a light dusting of canola oil, to get my light dusting of salt to stick. 

“Bake for about 20 minutes at 450, or until they are golden brown.” My oven runs hot, which I found out when I baked blueberry cheesecake cookies, so I turned it down to about 425 and put them in. I checked them at 17 minutes and they got a little darker than I would have liked. I wished I’d checked them a minute or two earlier. 

Results


Burnt but still edible.
Pulling my slightly burnt pieces off the rack ended up breaking them in half a few times, which I'm sure could have been avoided with some cooking spray.

I waited a minute or two for them to cool enough to not scald my tongue and dug in. They have a great crunch on the outside and a real creamy inside. They easily fall apart though so be careful. I enjoyed them all right with the Parmesan cheese sprinkled on top, but I thought they would do well with a much bolder spice, like red pepper or Cajun seasoning.


Second batch, a little more appetizing, a lot less burnt.
My second batch I sprayed the rack and they came out much easier. I also added Cajun seasoning to the salting portion of the recipe. I cooked the second batch for about 15 minutes after nudging my oven down a hair from 425 degrees. My tweaking resulted in a much less burnt version of the avocado fries. This appetizing plate was calling me. I enjoyed this batch without parmesan more. The Cajun spices blending well with avocado, but I think you could season to your taste with any number of different spices. I’m not a big parmesan cheese fan (it’s not even in my top three white cheeses), so those who are more into its flavors might enjoy that seasoning better than my Cajun version.

Second batch turned out well and tasty.
I definitely recommend them for taste, but it’s a bit of a hassle as a recipe and quite messy. I think it’s a versatile recipe with lots of potential variations, but it’s not going to be one I bust out a lot. But if you’re looking for a fried food alternative and you’re an avocado fan, this should definitely be in the mix.


— Nicole Franz | NiFranz@News-Herald.com | @FranzOrFoe
Follow my Mission: Pinpossible board on Pinterest.

Labels: , ,