Blogs > Mission: Pinpossible

Nicole Franz is a copy editor and paginator at The News-Herald in Willoughby. She takes all those sweet recipes, grueling workouts, cleaning tips, money-saving tricks, do-it-yourself projects and looks that seem so cool on Pinterest and writes about how they really turn out.

Monday, October 29, 2012

Heavy-handed seasoning mars great recipe for buffalo chicken cups

Definitely a mess-free appetizer — easy to eat in two bites (or one big one)

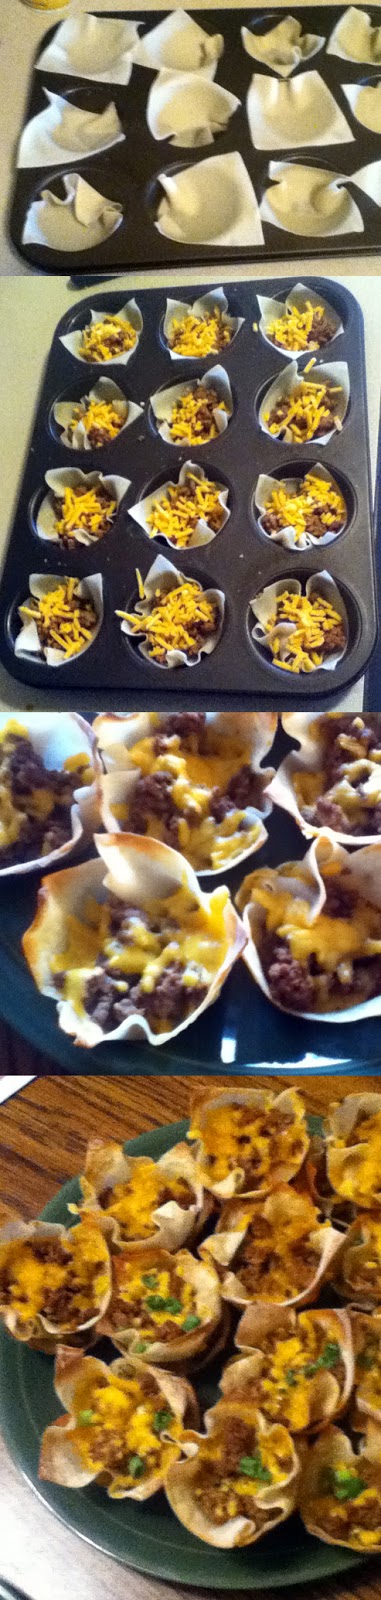
I blogged last week about these yummy mini wonton tacos and had some leftover wonton wrappers from that recipe. I actually forgot I had them in my fridge for about two weeks. I thought I had the wonton wrappers sealed in an airtight bag, but it turns out I had left the package partially open. One corner of the wontons was exposed to the air and hardened as a result. I figured I could rescue the wontons by cutting off the hardened bits and still use them for this pin I saw on Pinterest for buffalo chicken cups. Turns out I was right.

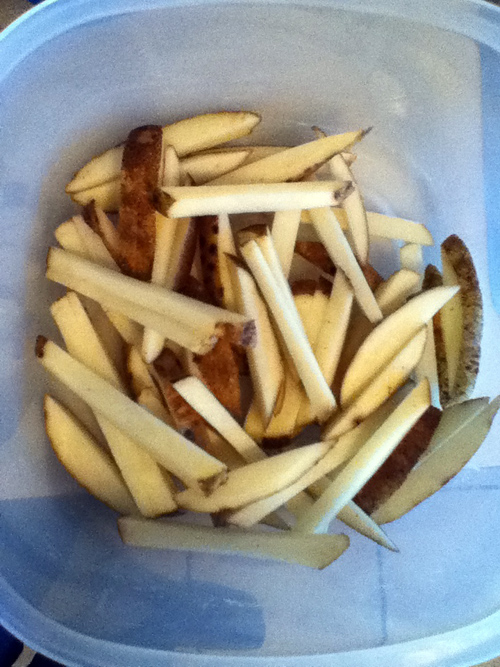
Rescued wonton wrappers sans crusty corner

The pin links to a blog post by a very happy-looking woman who shares this yummy recipe.

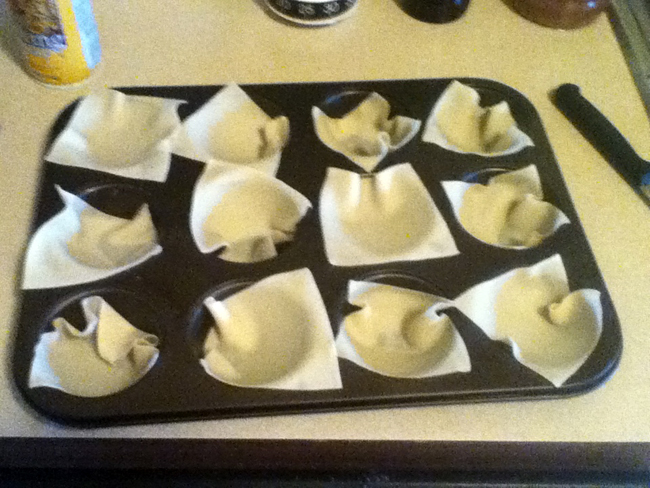
Uncooked wonton wrappers
That might be too much seasoning

Ingredients

2-3 boneless, skinless chicken breasts
2 Tbsp. olive oil
1/2 tsp. smoked paprika
1/2 tsp. chili powder
24 wonton wrappers
1 Tbsp. butter, melted
1/2 cup cayenne hot sauce (I recommend Frank's "Red Hot")
1/2 cup blue cheese crumbles
3 scallions, sliced thinly

Instructions

Preheat oven to 350F degreess.

Brush chicken breasts with olive oil, and then sprinkle evenly with the smoked paprika and chili powder. Place in a baking dish and cook for 20-30 minutes, or until the center is no longer pink and the juices run clear. Remove chicken and let cool, then shred. 
Nice and cooked, ready to shred

Meanwhile, fit a wonton wrapper into each of 24 mini baking cups, pressing the wrappers carefully but firmly into sides of cups. (Be careful to keep the corners of each wonton wrapper open; otherwise you will not be able to fill them!) Bake for 5 minutes or until very lightly browned. Keep wontons in baking cups. 
In a medium-sized bowl, stir together the melted butter and hot sauce. Add the chicken and stir until well coated. Then fill each wonton cup with a tablespoon or two of chicken, and then top with a pinch of blue cheese. Return wonton cups to oven and cook for another 5-10 minutes, or until cheese is soft and melty. Remove and top with sliced scallions, and serve warm. These are best served immediately.
Shredded chicken mixed with the melted margarine and hot sauce

How it went

“Preheat oven to 350F degrees.” My oven runs hot, so I went with 325 degrees. 

“Brush chicken breasts with olive oil, and then sprinkle evenly with the smoked paprika and chili powder.” I actually don’t own a pastry brush (or really any type of brush, except my hairbrushes). So I washed my hands really good and dropped a spoonful of oil over each chicken breast and used my hands to coat the chicken as evenly as possible. I mixed the paprika and chili powder together beforehand in a ramekin then sprinkled them over both sides of the chicken breasts as evenly as possible. I ended up adding more paprika and chili powder than the recipe called for because I thought the chicken didn’t look thoroughly coated. (Spoiler alert: My heavy hand here was not called for.)

Lightly baked wonton wrappers
“Place in a baking dish and cook for 20-30 minutes, or until the center is no longer pink and the juices run clear. Remove chicken and let cool, then shred.” This part is simple, particularly if you’re a frequent baker of chicken breasts like myself. I pulled the chicken breasts out onto a cutting board where I used a knife to shred the chicken.

A heaping spoonful of chicken
“Meanwhile, fit a wonton wrapper into each of 24 mini baking cups, pressing the wrappers carefully but firmly into sides of cups. (Be careful to keep the corners of each wonton wrapper open; otherwise you will not be able to fill them!) Bake for 5 minutes or until very lightly browned. Keep wontons in baking cups.” This probably would have been easier for me if my wonton wrappers weren’t missing a corner. It actually turned out easier than I would have thought though. I followed the instructions to the letter, and this step turned out perfectly as possible given the damaged wrappers with which I started.

“In a medium-sized bowl, stir together the melted butter and hot sauce. Add the chicken and stir until well coated.” I used melted margarine and Frank’s RedHot sauce. I got heavy-handed here again, adding some extra hot sauce.   

Sprinkled with slices of pepper jack cheese
“Then fill each wonton cup with a tablespoon or two of chicken, and then top with a pinch of blue cheese.” I doled out a spoonful of chicken into each wonton wrapper and topped with bits of pepper jack cheese, because, frankly, blue cheese kind of grosses me out.

“Return wonton cups to oven and cook for another 5-10 minutes, or until cheese is soft and melty.” I baked mine for about 6 minutes and pulled out cups with ooey-gooey cheese.

“Remove and top with sliced scallions, and serve warm. These are best served immediately.” This part is nice and easy.

Results

As I may have mentioned earlier, I kind of over-seasoned these. I really enjoyed them, they were crunchy and very spicy — something I love. The friend I shared them with described the buffalo chicken cups as sinus-clearing and over-seasoned. 
Ooey-gooey
At every chance I got I opted to add heat and spice. I used extra paprika, chili powder and hot sauce and subbed out blue cheese for pepper jack cheese. Had I followed the directions to the letter, I think they might have been more crowd-friendly.


Sprinkled with scallions


I will definitely be adding this one to my keeper list (and sticking closer to the recipe next time). I’ll probably repeat this easy-to-make appetizer with mozzarella cheese on my second attempt.
Turns out pretty good and very tasty

— Nicole Franz | NiFranz@News-Herald.com | @FranzOrFoe
Follow my Mission: Pinpossible board on Pinterest.

Labels:

Monday, October 22, 2012

Endlessly customizable mini wonton tacos are easy appetizer


I’ve seen a lot of nifty easy-to-eat appetizers, but those using wonton wrappers as a base seem so easy to eat and make. I’ve been dying to try them for ages, but haven’t been able to find wonton wrappers in my local grocery stores. I had been all over the Giant Eagle closest to my home and several other grocery stores (Heinen’s, Marc’s, etc.) looking for the wrappers to no avail. One of my co-workers (I believe it was Theresa Audia) happened to mention seeing them in the Giant Eagle by the Great Lakes Mall. I made a trip and sure enough found exactly what I needed in the refrigerated section on the wall by the produce.

Having procured the wonton wrappers I went through and found one of the appetizer recipes I wanted to try: Mini tacos. The pin has all the instructions and links to a Flickr page.

Instructions

“Mini tacos: Won ton wrappers in muffin tins filled with taco seasoned ground meat, cheese & bake for 8 minutes at 350. Top with favorite taco toppings! Perfect for entertaining!”

How it went

These instructions are ridiculously easy to follow. Honestly, you don’t even need instructions to repeat this recipe.

I browned some ground turkey and added a packet of taco seasoning while my oven preheated (325 degrees for my oven — it runs hot).

I elected to spray my muffin tray before arranging the wonton wrappers.

I added the seasoned taco meat and sprinkled some shredded cheddar cheese on it. I filled my wonton wrappers pretty full, but you may want to fill yours less if you’re planning on adding more toppings later.
I baked mine for about seven minutes, pulling them out when the edges started to brown. Once they were finished baking they were easily removed from the muffin tin using a spoon. 

I topped half of mine with green onions and served them up for a small group of friends.

Results

They were a total hit with the group, earning rave reviews and clean plates. 

This recipe is endlessly customizable. Serve with sour cream, salsa, tomatoes, onions, guacamole, whatever you want. Use different meat or cheese. This would be very easy to prep for ahead of time as well (brown the meat and season it beforehand). This is definitely making it onto my keeper board. 


— Nicole Franz | NiFranz@News-Herald.com | @FranzOrFoe
Follow my Mission: Pinpossible board on Pinterest.

Labels: ,

Monday, October 1, 2012

Gwyneth Paltrow recipe offer guilt-free French fries crazy easy to make

All sliced up and ready to go.
So I haven’t gone grocery shopping in a while, and was trying to come up with a Sunday afternoon pre-work meal that would fill me up for a night of editing and page design without making me feel guilty. I rummaged through my pantry and fridge and didn’t find too much that was striking my fancy. I did have potatoes though and remembered pinning something about a healthier french fries recipe recently.

So while I nuked some frozen vegetables in the microwave (I’m a big fan of frozen veggies as a snack/meal with some combination of cheese, spices or salsa) I found this pin touting Gwyneth Paltrow’s No-FryFries from her cookbook, “My Father’s Daughter: Delicious, Easy Recipes Celebrating Family & Togetherness.”

If you click on the pin it links you to Self and a full recipe, but again I went with what was on the actual pin.

What was the point of dunking them in water?

Instructions

"Gwyneth Paltrow's No-Fry Fries, just cut up your potatoes and place them in a bowl of cold water, then dry them off and toss them with olive oil, place them on a cookie sheet and sprinkle with sea salt, then bake at 450 for about 25 minutes, turning occasionally."

How it went

I grabbed two Idaho potatoes and scrubbed them down, which is much harder to do effectively without a scrub brush, but I digress. I turned on my oven before I tracked down a cutting board and knife.

I didn’t skin my potatoes, because it didn’t say to on the pin (though it does on the Self recipe), so all I had to do was hack up the potatoes into fry-shaped strips. I cut the potatoes in half first to facilitate easier cutting.

Then I tossed the potatoes in a Rubbermaid container that I knew had a lid and added enough water to cover them. I’m not entirely sure what this step did, unless it was meant to clean the potatoes further. 

Seriously, was this for cleanliness? I already scrubbed the potatoes.

I went a tad overboard on the olive oil.
Then I drained out the water and tossed the potatoes on some paper towels so I could pat them dry with another paper towel.


I dried out the container I just had the fries in and dumped them back in there along with about 3 tablespoons of olive oil. I put the lid on and shook the potatoes up until I felt they were solidly mixed (a few healthy shakes).

I decided I wanted to be super lazy and put aluminum foil over my cookie sheet, which I sprayed with non-stick cooking spray. Then I fished the potatoes out of the container with a slotted spoon so I wouldn’t end up wasting a ton of olive oil (that stuff’s expensive!) on the cookie sheet.

I arranged them haphazardly on the sheet and then tossed a bit of sea salt on them.

Oiled up and ready for the beach (or my oven).
I placed them on the middle rack of my oven and promptly forgot about them for 25 minutes. The pin says to turn them occasionally (how vague is that?), but I didn’t bother.

They're so shiny!
I pulled them out after 25 minutes and tossed them on a plate for easy eating.

Results


Maybe I should have turned these, or perhaps taken them out a little earlier.
This was crazy easy to make. It required almost no effort, and the fries were a satisfying substitute for regular old fried french fries. Some of the fries turned out a little crunchier (read burnt) than I would have liked, but most of them were the perfect amount of crispy.

The water part and subsequent drying of the recipe seemed a little bit unnecessary and wasteful. I’d probably skip this step in the future and see how it goes.

I wasn’t sure how much olive oil to use and definitely overdid it on that part, but I ended up just tossing my veggies in the olive oil with some spices and a little Parmesan cheese and it ended up very yummy and not wasteful. The Self version of this recipe says to use 2 tablespoons of olive oil. That would probably have been a perfect amount, and I wouldn’t have felt the need to fish my fries out of the container with a slotted spoon.

I also overcooked them a bit (big surprise). I am eventually going to figure out how to bake things perfectly in my oven (and then I'm promptly going to move out of my apartment probably). 

I will definitely make these again, so kudos to Gwyneth Paltrow. I really enjoyed her turn as Pepper Potts in the “Iron Man” and “Avengers” movies, and she showed how multitalented she is with a turn on “Glee” and now this cookbook. Thanks to those distinctive roles, I’ve finally managed to not confuse her with Cate Blanchett.

UPDATE

Thanks to my college friend and Post colleague Emily Carroll I learned that the water removes excess starch and helps make the fries crispier. So apparently dunking the potatoes in water is a worthwhile step. (5:32 p.m. Oct. 1, 2012)

— Nicole Franz | NiFranz@News-Herald.com | @FranzOrFoe
Follow my Mission: Pinpossible board on Pinterest.

Labels: , ,